Hello, how can we help you better?
Contact Management in EngageBay
This guide will tell you all about how to add and manage your contacts in EngageBay, and keep your lists clean.
Written by Roy
Updated over
6 months ago
Contacts are the most important elements of marketing automation. The more information you have about your contacts, their preferred communication channels; the better are your chances of engagement and communication with them.
In this article, you'll learn about the various contact management features we offer. We'll also provide examples of when you might use these features and where to find them in your EngageBay account.
What is a Contact?
A contact in EngageBay is defined by an email address. A contact can (and often does) have additional information, but the email address is the primary form of contact.
Adding a Contact
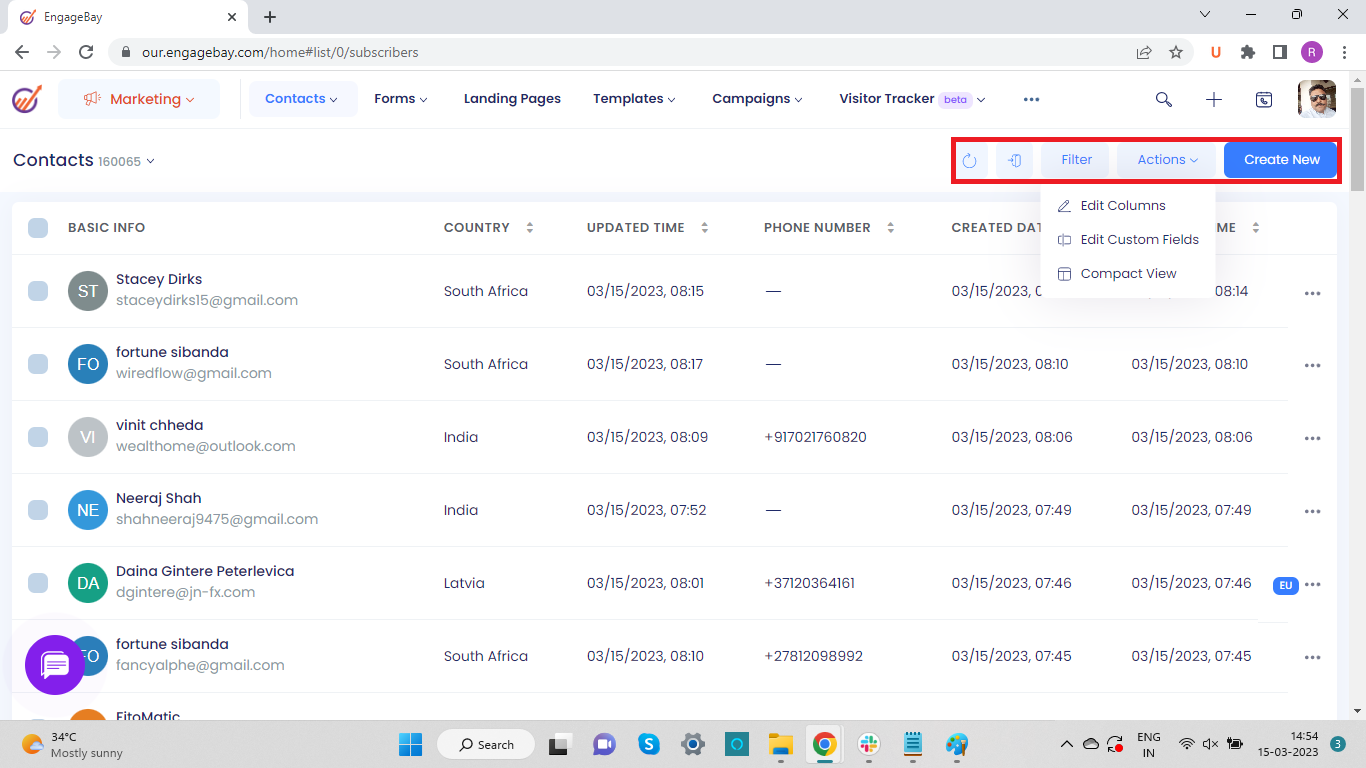
To add contacts, go to the Contacts tab. On the top row, you’ll have the options to “Import” or “Create New Contact.” You can import a list of contacts, individual contacts, or download a list of contacts around your preferred parameters.
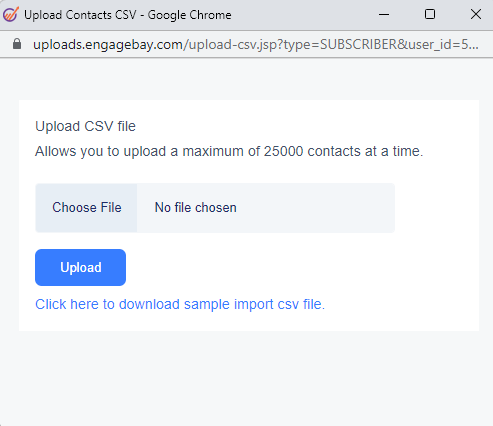
Once you select the Import icon, you will have the option to import your contacts via a .CSV file, copy & paste, or view. recent imports. Additionally, you can connect to many services where EngageBay will automatically pull in your contact data.
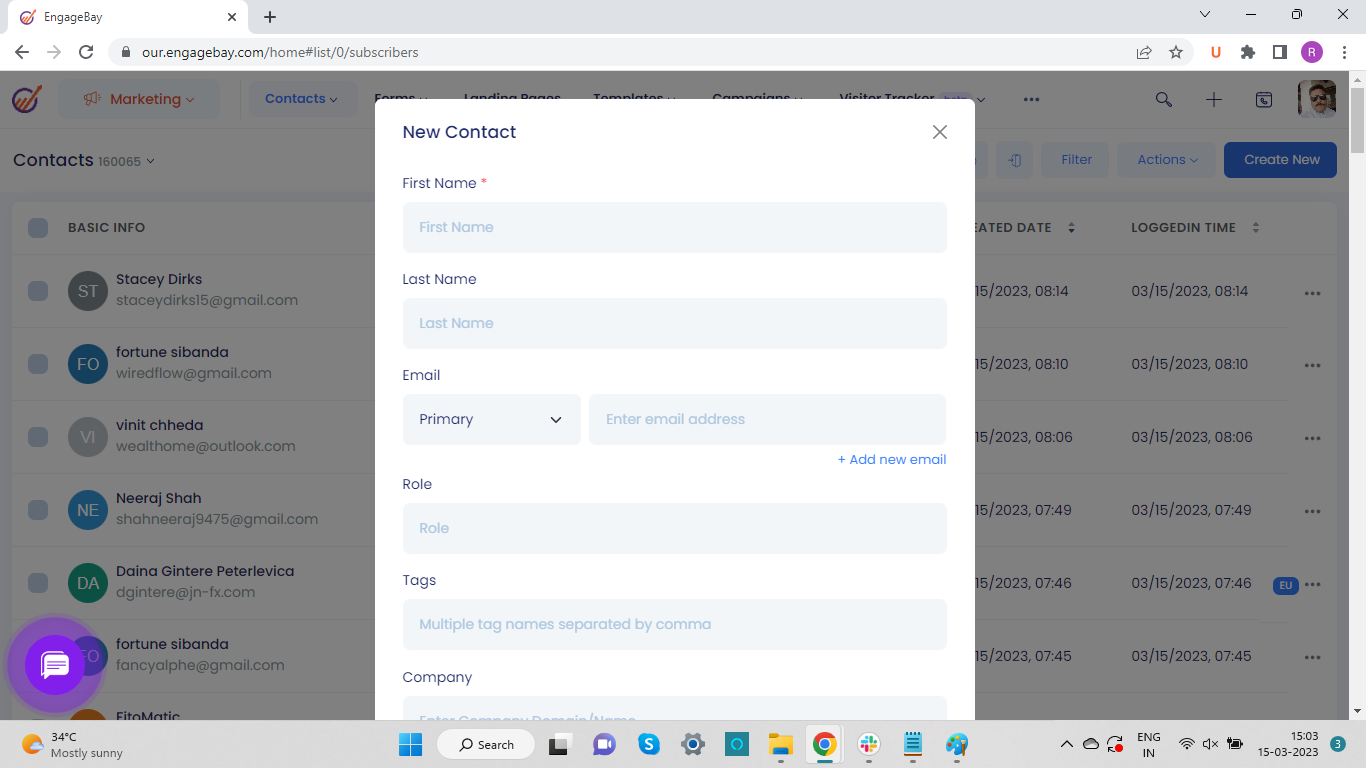
If you just have only a single contact or a few of them to enter, you can always click the blue “Create New” button on the top left and quickly type in the information. After you enter their information, you will have the ability to add them to lists, create a deal, add them to specific automations, add tags, or apply advanced list options.
What is a contact record?
A Contact Record collects and organizes all the information you've collected about a contact. From the Contact Record you can edit and add information and a variety of contact management features are available to you. You can subscribe and unsubscribe from lists, start and stop automations, and add and remove tags. From the contact record you can also see a stream of the contact's recent activity, create tasks, and add notes.

Contact records store information about your contacts, such as their email address, or the last time they filled out a form, and more. EngageBay creates default properties in each account to store key information. Some of those properties, such as the lifecycle stage properties, are automatically populated by EngageBay.
Contact Fields
EngageBay offers you a number of default fields on every contact record. You use these to make sure that you are collecting the right kind of data for your business.
Some of the default contact fields are:
- First Name
- Last Name
- Email (Primary/Secondary)
- Role
- Tags
- Company
- Phone Number (Work/Home/Mobile/Main/Fax)
- Website (All social handles/web assets)
- CMS Source
- Signup Source
Other than these and many more default contact fields, you can create new custom contact fields according to your specific business requirements.
Moreover, you can choose to either create a contact manually or import a list of contacts with their details by importing a .CSV file from your saved files/folders.
EngageBay also gives you a 360-degree contact view of all activities performed on the contact from the time they were added. These include:
- Activities
- Emails
- Deals
- Tasks
- Notes
- Docs
- Products
- Workflow
- Automations
- Calls
- SMS
- Call Scripts
- Sources
- Web Analytics
- Events
- Tickets
- Chats
- Form Submissions
- Delete and Merge Contacts
Moreover, you can create various actions on contacts like changing the contact view, and perform bulk actions on the contacts.
360 Degree Contact View
EngageBay gives you a 360 degree view of all activities performed on the contact from the time they were added.

Activities: It shows all the activities that are performed on the contact.

Emails: It shows all the emails that are sent to the contact. If you want to check the email conversations that were sent using your email account, then you need to select the email account from the top right by clicking on the EngageBay Emails drop down menu.

Deals: It shows all the deals for that contact. To add a deal to the contact, you have two options 1. Existing Deal 2. Add New Deal.

- Existing Deal: This is used to add the existing deals; please click on it, enter the deal name and select the deal and it gets added. You can add multiple deals to the contact in the same way. Once done, click submit.
Add New Deal: This is used to add a new deal to the contact, please click on it, enter the Deal Name, Description, select the Track, Milestone, enter the deal amount, close date, notes, select the owner, select the contacts, companies and click Save
Tasks: It shows all the tasks for the contact. To add a task to the contact, you have two options 1. Existing Task 2. Add New Task

- Existing Task: This is used to add the existing tasks, please click on it, enter the task name and select the task and it gets added. You can add multiple tasks to the contact in the same way. Once done, click Submit
- Add New Task: This is used to add the New Tasks, please click on it, enter the Task Name, select the Task Type, Priority, Enter the Due date, select the date and time for Email reminder, enter the notes, add the contacts, companies, deals, select the status of the Task and the owner of the task, and click Save
Notes: It shows all the notes that are added to the contact. To add a new note, click the Create Note button, enter the subject and the description of the notes. In the description you can use @username and it will send an email to that user with the notes.
If you want to create a follow up task, select that option and select the date.

Docs: It shows all the documents that are added to the contact. To add an existing document or a new one, the two options are: 1. Existing Document 2. Add New Document.

- Existing Document: This is used to add the existing document; please click on it, enter the name of the document, select it, and it gets added. You can add multiple documents to the contact in the same way. Once done, click Submit
- Add New Document: This is used to add a new document; please click on it, enter the title, description, drag and drop the files, or click on it to upload the files, select the folder, contacts, companies, and deals. You can upload an image to the file, by clicking on the upload image button. Once done, click on the Submit button.
Products: It shows all the associated products for the contact. To add a new product there are two options. 1 Add Existing Product, 2. Add New Product.

- Add Existing Product: This is used to add the existing products; please click on it, enter the name of the product, select it and it gets added. You can add multiple products to the contact in the same way. Once done, click Submit
- Add New Product: This is used to add a new product; please click on it, Enter the Name, Description, Price, Currency and Discount. You can also upload the image of the product by clicking on the upload image button. Once done, click on the Save button
Workflow: It shows all the workflows that are Active/Completed on the contact. To add a contact to the workflow, please select the workflow from the drop down on top right and select Add.

Automations: It shows all the Automations that are Active/Completed on the contact

Calls: It shows all the calls that were made to/received by the contacts. Call logs are automatically added to this tab if you set up telephony integration.
If you don't want to use telephony integration and want to add the call logs, please click the button “Add Call Log”. enter the Call Id, select the Call Type, Service, enter the ‘From’ phone number and the ‘To’ phone number, Start Time, Duration, Recording URL, select the status and add the Notes and click Save.

SMS: It shows all the SMS that were sent to/received by the contacts.

Call Scripts: It shows all the call scripts for the contact.

Sources: It shows the source of the contact, It shows the lists in which the contact is added, It shows the Sequences and Broadcasts in which the contact is added.

Web Analytics: It shows the web analytics of the contact. Which page of your website they landed on, how long they spent on each page, the different pages they browsed through besides other information pertaining to their behavior on your website.

Events: It shows all the EngageBay events of the contact. To add an existing event or a new one, the two options are: 1. Existing Event 2. Add New Event.

Existing Event: To add an existing event, please click on it and type the name of the event and select it and it gets added. You can add multiple events to the contact in the same way. Once done, click Submit
Add New Event: To add a new event, please click on it and enter the event name, start time, end time, email reminder date and time, choose the color, contacts, companies, deals and the task owner, and click Save.
Tickets: It shows all the tickets raised by the contact. To add a new ticket to the contact, click on the “Add New Ticket” button and enter the CC email if you want to CC, enter the Subject. select the Assignee, enter the Message and click on Submit, and it will create a new ticket.

Chats: It shows all the chats that are associated with the contact.

Form Submissions

It shows all the details of the forms that are submitted by the contact.
Delete and Merge Contacts
Within the single contact view, you have three dots above the contact name from where you can delete or merge contacts. Deleting contacts deletes all of their information, so use this option carefully. You will receive a warning if there are any Deals connected to this contact.

Once you select merge, a pop up box will open up and ask you to enter another contact's email that you may want to combine, in a search box.

If you select a contact to merge, it will ask you to customize the merge by assigning primary/secondary email address/phone number, etc.

Perform Bulk Actions on Contacts
Returning to the Contacts tab, you have the option to select multiple or all contacts and perform bulk actions on them.

Some of the bulk actions that may be performed on contacts are:
Add Tag - It is used to add a tag to all the selected contacts
Delete Tag - It is used to delete a tag from all the selected contacts
Add to Sequence - It is used to add selected contacts to the sequence
Add to Broadcast - It is used to add the selected contacts to the broadcast
Send Email - It is used to send the emails to all the selected contacts
Send SMS -It is used to send SMS to all the selected contacts
Add to Static List - It is used to add the selected contacts to the static list.
Send Double Opt-in - It is used to send the Double Opt-in email to the selected contacts.
Mark as Confirmed - It is used to change the status of the selected contacts to Confirmed.
Validate Emails - It is used to validate all the selected contacts
Unsubscribe - It is used to Unsubscribe all the selected contacts
Resubscribe - It is used to send Resubscribe email to all the selected contacts
Export as CSV - It is used to export all the selected contacts
Change Owner - It is used to change the owner of all the selected contacts
Execute Workflow - It is used to add the selected contacts to the Workflow
Call Broadcast - It is used to add the selected contacts to the call broadcast (Auto Dialer)
Remove from Sequence - It is used to remove the selected contacts from the sequence.
Remove from Workflow - It is used to remove the selected contacts from the workflow
Remove from Automation - It is used to remove the selected contacts from the Automation
Send Push notification - It is used to send push notifications to all the selected contacts
Update Fields - It is used to update the fields of all the selected contacts
Delete - It is used to delete all the selected contacts.
Actions on Contacts:

Edit contacts: To edit the contacts, click the 3 dots on to the right of the contact and select Edit
Duplicate Contacts: To duplicate the contacts, click the 3 dots on to the right of the contact and select Duplicate
Delete Contacts: To delete the contact, click the 3 dots on to the right of the contact and select Delete
Mark As Confirmed: To mark the contacts as confirmed, click the 3 dots on to the right of the contact and select Mark as Confirmed.
Changing the Contacts View

Using the Actions Menu on the top right you can select the columns that you want to display, Edit the custom fields and Change the view.
Edit Columns: Please click on it and select the columns from the left pane that you want to display on the contacts view and from the right pane drag and drop the position of the columns as per your preference and click Submit
Edit the Custom Fields: Please click on it and it will list all the custom fields, please click the 3 dots on the right of the custom field and select Edit.
Change the View: Please click on it to select either Flexible View or Compact View.
Summary
Knowing how to navigate, update, and edit your contacts is a vital skill. It will enable you to do in-depth contact research and potentially identify trends. The contact page records all of your interactions with your individual contacts.
Did this answer your question?


