Hello, how can we help you better?
Forms in EngageBay
This guide tells you all you need to know about creating forms in EngageBay
Written by Roy
Updated over
6 months ago
It is widely accepted that forms are the gateway to your contact database. When visiting your website, contacts enter your database by submitting their contact information to forms. Without forms, your database would lose out to a large number potential contacts.
This guide tells you all you need to know about EngageBay forms, and it explains why using forms is crucial to your success with EngageBay.
Forms:
There are 2 types of forms in EngageBay:
1. Inline forms
An EngageBay Inline Form is a lead capturing form that you can embed to a certain page on your website. It will appear as part of the page. You can modify the form to suit your website’s theme.
And if you don’t have a website, you can host the inline form. You can share the permanent URL of the form.
And if you don’t have a website, you can host the inline form. You can share the permanent URL of the form.
.png)
2. Popup forms
The EngageBay popup form appears/pops up when a user is browsing the website. The popup forms are based on preset conditions, allowing you to capture leads based on their behavioral patterns
Creating an Inline Form:
Here are the steps to create an inline form in EngageBay:
- Navigate to the Marketing dashboard.
- Go to Forms
- In the upper right corner, click Create Form.
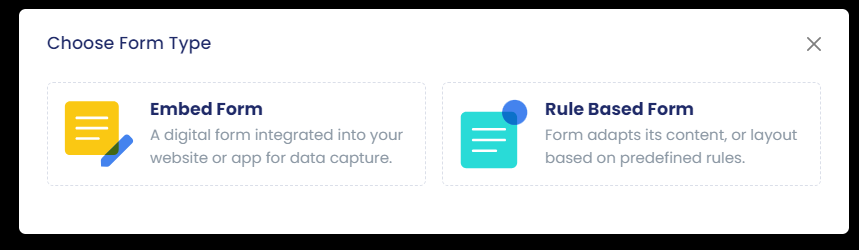
- Select Embed form from the popup that appears.
- Start by adding a name to your form. Once done, you can either choose from a predefined style for your form or create a custom one.
- Next, enter the text and adjust the basic settings of your form under the Change Text sub-tab. In the left panel, add the title, description, and footer of the form and other settings. You can Preview your form on the right.
- Go to Look and Feel to make changes to form font size and color, background color, button background, and text color.
- Under the Field tab, you can customize existing fields and add more fields if needed. You can also change the submit button text here.
- In the Settings tab, you will find four sub-tabs in the left panel.

Main Settings: Set the success message once visitors have filled up the form. You can even set a redirect URL for every subscriber on the form.
Double Opt-in Email: A double opt-in email allows you to send an email to your new subscriber to confirm the email address. The new subscriber follows the link in the email or replies to the message.
Autoresponder: Send an autoresponder email once a visitor fills up the form.
Contacts: It shows the list of users that have subscribed to the form you published.
9. Hit the Save button. This will generate an embed code that you can use to add the form to your website. You can even email the code to your website developer. Or, get the embed code by clicking on the 3-dots on the right side of the listed forms and choosing the Code option. It will also show the Permanent Link of the form where it is hosted and can be accessed directly online.
Actions on Inline Forms:

Getting the code: To get the code of the Inline form, please click the 3 dots to the right of the Form and select <>Code. It will display a popup with Embed Code, Permanent Link, Source Code.
Preview the form: To preview the Inline form, click on the 3 dots to the right of the Form and select Preview.
Duplicate the form: To duplicate the Inline form, click on the 3 dots to the right of the Form and select Duplicate
Edit the form: To edit the Inline form, click on the 3 dots to the right of the Form and select Edit
Delete a form: To delete the Inline form, click on the 3 dots to the right of the Form and select Delete
Creating a Popup Form:
- Navigate to the Marketing dashboard.
- Go to Forms > Popup Forms.
- In the upper right corner, click Create Popup Form.
- Add a name for your form. Once done, choose what form type and position it would show up through the Style tab. There are four styles: Popup, Noty Bar, Bottom Left, and Bottom Right.
- Under the Call to Action tab, you can either enable or disable the call to action. You can even tweak around with the text on the form itself.
- The Themes tab lets you choose from various available themes for your form.
- Go to Design > Look & Feel to make changes to form font, size, and color, background color, button background, and text color. The Field tab allows you to modify existing fields or add new ones.
- In the Settings tab, you will find five sub-tabs in the left panel.

Main Settings: It allows you to set Conditions and Display Options for your form.
Double Opt-in Email: A double opt-in email allows you to send an email to your new subscriber to confirm the email address. The new subscriber follows the link in the email or replies to the message.
Thank You: Set the success message that gets displayed after visitors have filled up the form. You can even set a redirect URL for every subscriber on the form.
Autoresponder: Send an autoresponder email once a visitor fills up the form.
Contacts: It shows the list of users that have subscribed to the form you published.
9. Once done, hit the Save button. It will generate an embed code that you can use to add the form to your website. You can even choose to email the code to your website developer. The other way to get the embed code is by clicking the 3-dots on the right side of the listed forms and choosing the Copy Code option.
Actions on Popup Forms:

Get the code: To get the code of the Inline form, please click the 3 dots to the right of the Form and select <>Copy Code. Preview the form: To preview the Inline form, please click the 3 dots to the right of the Form and select Preview.
Duplicate the form: To duplicate the Inline form, click on the 3 dots to the right of the Form and select Duplicate
Edit the form: To edit the Inline form, click on the 3 dots to the right of the Form and select Edit
Delete a form: To delete the Inline form, click on the 3 dots to the right of the Form and select Delete
Summary
Forms are important and necessary. They are the primary way that contacts enter your database. You can choose to use third-party forms to add contacts to your EngageBay account, but remember that doesn’t yield active contacts, which you need to reach your business goals.
If contacts aren’t submitting data to EngageBay forms, they have to work even harder to become active contacts in our platform.
Did this answer your question?


