Hello, how can we help you better?
Lists in EngageBay
This guide tells you all you need to know about creating lists in EngageBay
Written by Roy
Updated over
6 months ago
Lists are an important part of your marketing activity. Apart from email sends, lists can help you identify how many contacts in your database have certain traits in common. Simply put, they are the first layer of segmentation.
You use tags to segment your lists, and you use custom fields to get even more granular and targeted than you can with tags.
In this guide, we define lists for you, as well as tell you all about lists in EngageBay.
There are two types of lists in your EngageBay account: Smart Lists and Static Lists.
Smart Lists
Smart lists (also known as Active Lists) automatically update your contacts based on certain criteria. Contact records are added to the list when they meet the criteria and removed from the list when they no longer meet the condition.
These lists are based on several different criteria, including the customer's recent feedback, their gender, their membership status, and more, depending on the type of information that can be pulled from your system. These lists are automatically updated and may be useful if you would like to send a quick message to all of your members, for example.
A few examples of when smart lists should be used include:
- Sending unique marketing emails based on individual contact record's behavior and properties. If you send out a regular newsletter, a smart list automatically manages the continually changing list of subscribers.
- Placing outbound calls to contacts based on behavior and property values.
- Grouping your contacts by lifecycle stage to continually identify behavior and properties for contacts in each stage.
- Segmenting records based on properties that change frequently over time, such as a record's Lead Score
Static Lists
Static lists do not update automatically. Here, you manually choose the contact you want to add to the list. A static list allows you to pick which customers are on it.
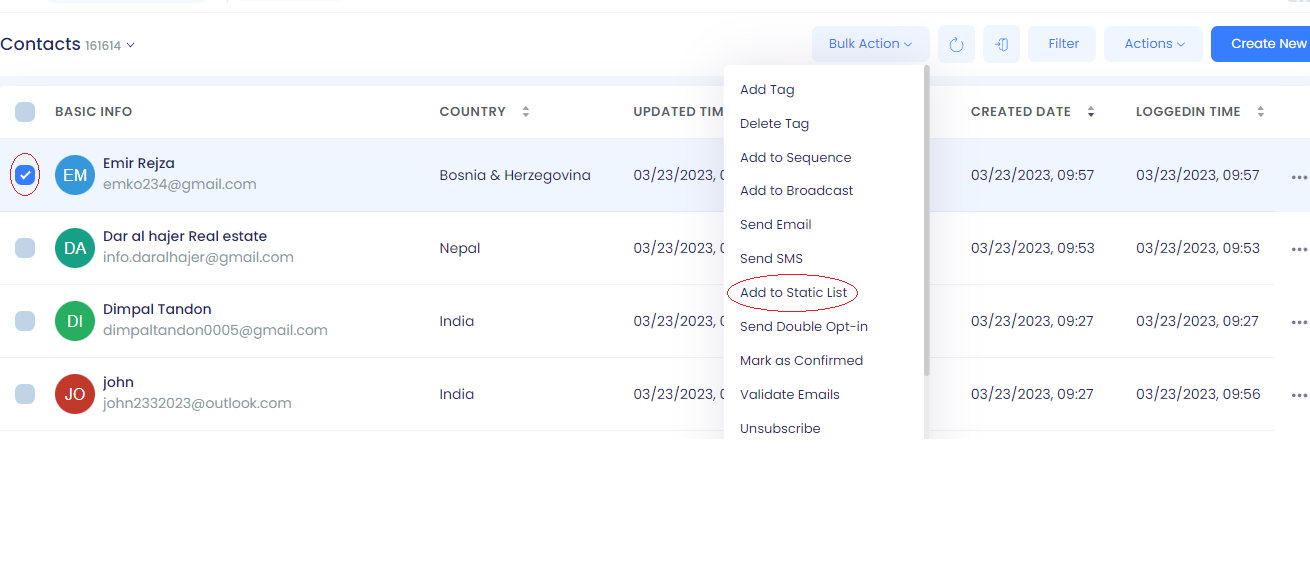
You can add customers to one of your static lists by browsing through your list of customers, checking off their name, and selecting 'Bulk Action' > "Add to Static List". Once you have your list ready, you can send a Scheduled Campaign to that list of people. These lists are useful if you have a specific list of customers in mind, that you would like to send a communication to.
A few examples of when static lists should be used include:
- Manually adding records to a workflow.
- Sending one-time email blasts, email campaigns that you don't run often, and for a list of contacts that doesn't change (e.g., event attendees, staff lists for an internal newsletter, or lists from a trade show).
- Manually grouping records that may not have a shared list criteria.
- Segmenting to bulk delete records from your account.
Creating/Setting Up a New List
- Log in to your Marketing module.
- On the top of your dashboard, navigate to Contacts > Lists.
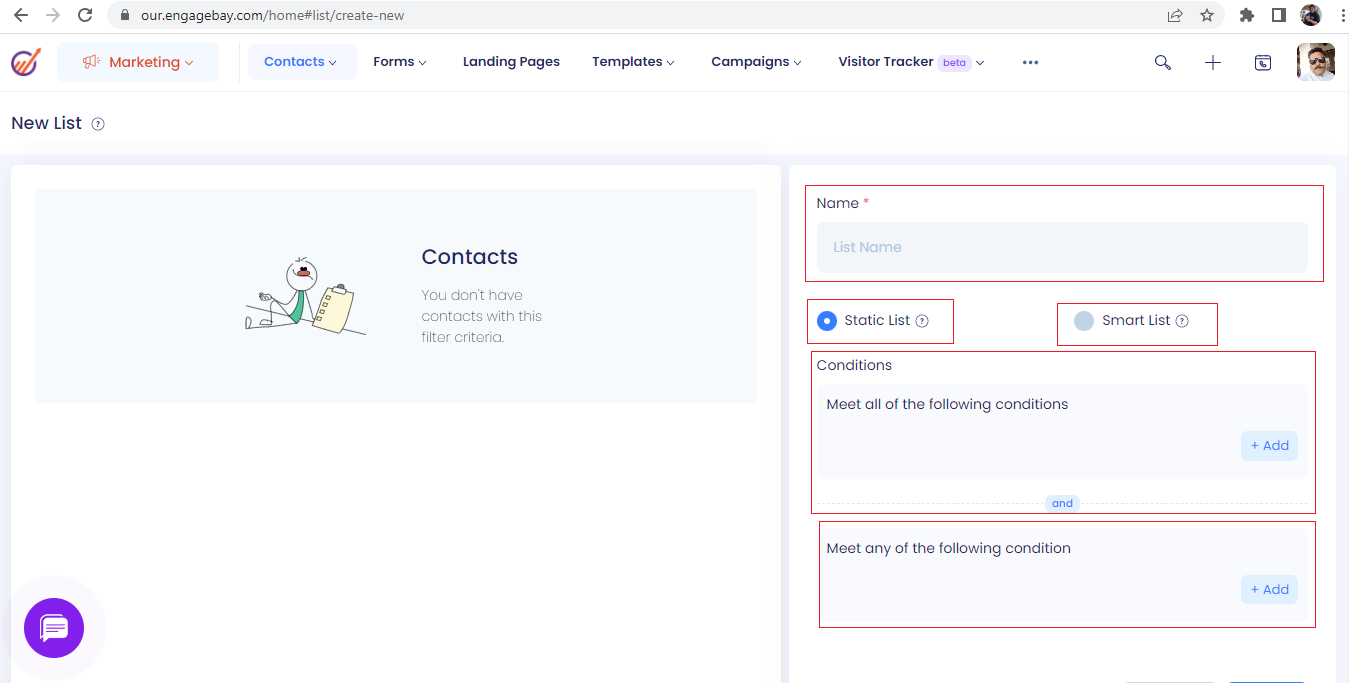
- In the upper right, click Create List.
- In the right panel, enter the name of your list and choose the type of list. The list tool in EngageBay allows you to create a list of contacts or companies based on different property values. A list can only contain one object type — either companies or contacts. You can also choose the type of list you want — Smart list or Static list.
- Add Conditions to the list if any. All the contacts that satisfy the condition will get added to the list.
- Once done, click Save. Your list may take some time to process.
Whenever you run a campaign, you can choose the list that you want to target.
Actions on Lists:
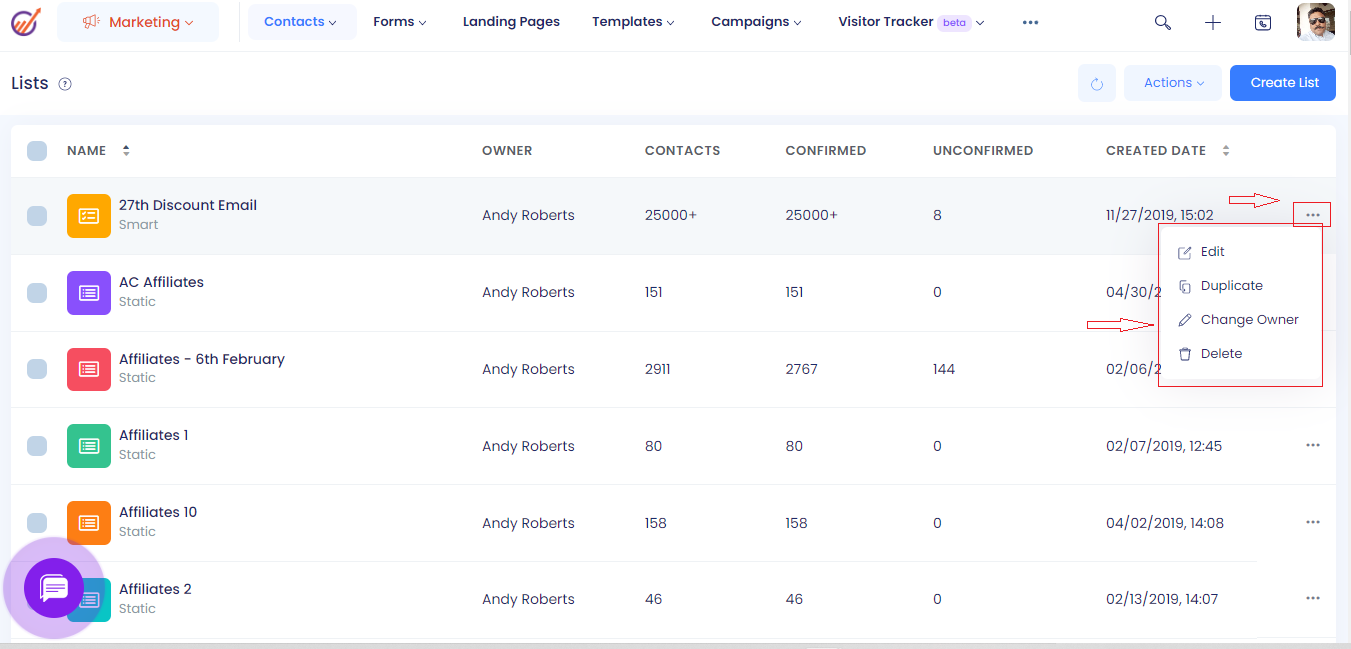
Edit the list name: To edit the list name, please click the 3 dots on to the right of the list and select Edit.
Duplicate the list: To duplicate the list, please click the 3 dots on to the right of the list and select Duplicate
Adding a contact to the Static List: To add a contact to the static list, please click the 3 dots on to the right of the list and select “Add Contact” and enter the details of the contact on the form that appears.
Delete a list: To delete the list, please click the 3 dots on to the right of the list and select Delete
Edit the conditions for Smart List:
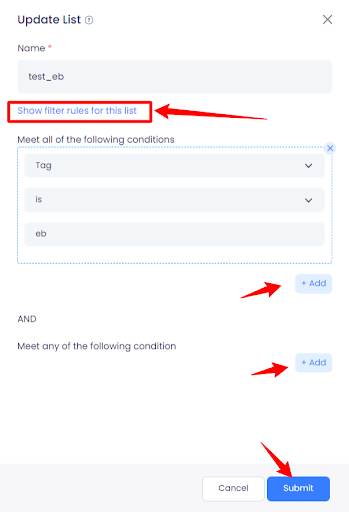
To edit the conditions of the smart list, please click the 3 dots on to the right of the list and select Edit, click on the blue link Show filters rules for the list and change the conditions and click on Submit.
Changing the Lists View:
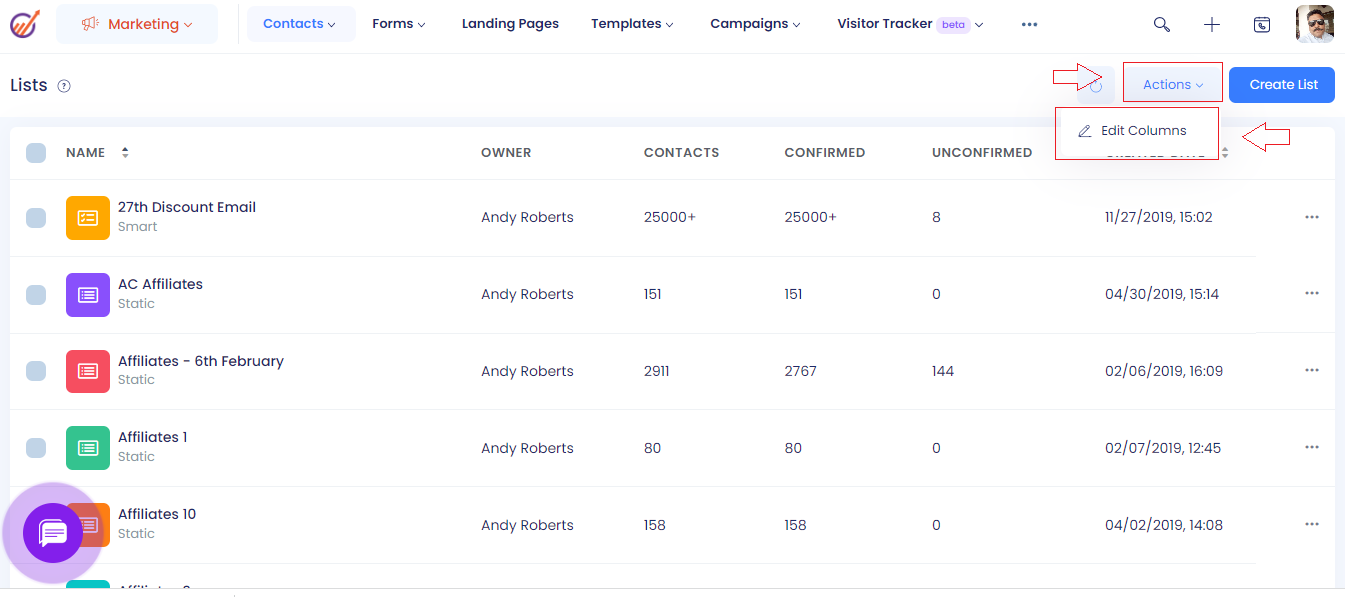
Using the Actions Menu on the top right you can select the columns that you want to display on the list view. To do that, please click on the Actions Menu and select Edit Columns, from the left pane select columns that you want to display on the Lists View and from the right pane drag and drop the position of the columns as per your preference and click Submit
Conclusion
As an entrepreneur and/or marketer, you should be careful with your list building activity. If you decide to create lists for message types, you have to be vigilant and ensure each message you send aligns with the message type.
Without a doubt, you need lists, tags, and custom fields in order to optimize your marketing automation. Lists allow for high-level organization, while tags and custom fields enhance your ability to send targeted messages. Your decision making in regard to lists will likely be affected by the number of products and/or services you offer.
Did this answer your question?


