Hello, how can we help you better?
How to enable chatbot?
Enable chatbot
Written by engagebay
Updated over
6 months ago
Please follow the below instructions to enable chatbot.
1. Please select the Live Chat module from the left drop-down and click on the Bots tab
2. Click the button Create Bot on the top right
3. Please enter the bot name
4. Please enter the website URL on which you want the chatbot
5. The chatbot will be created
Adding Dialogues and Replies
By default, you will find one dialogue "Welcome" in the left pane, you can click on it to edit and enter the content. The first dialogue will appear to the customer in the first place.
Please select the option "Set as Proactive message." and select the delay in seconds, so the first message pops up automatically with a delay based on the seconds that you have selected.
To add a reply button, click on the reply button and add the replies and then select the next reply.
Now to add the next dialogue, click the Add new dialogue in the left pane and name the dialogues and then add the replies.
For each dialogue that you create, you can add the replies accordingly.
Finally, please move the slider to publish from the top right and save the changes.
Please check the video:
Please check the screenshot for your reference:
.png)
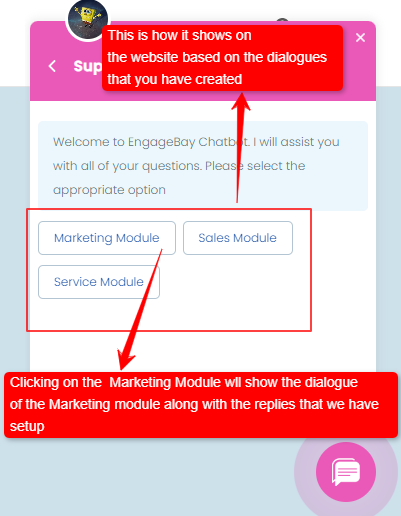
Please check the screenshot below that shows the way it appears on the chat widget:
Note: You need to enable the Live Chat for the chatbot to work. Please click here to check the article that has instructions to enable the live chat.
Did this answer your question?


